Each one of the 3D Stores come with a number of product displays. Often it is not the number of products you have, or you would like to change the size, color, or placement of the product displays. This article will show you how to edit your 3D Store Building to change the product displays.
This article is an extension on the Create a 3D Store article.
Login to your 3D Website and open the Admin Mode (Browse Menu on the bottom, Admin Home icon).
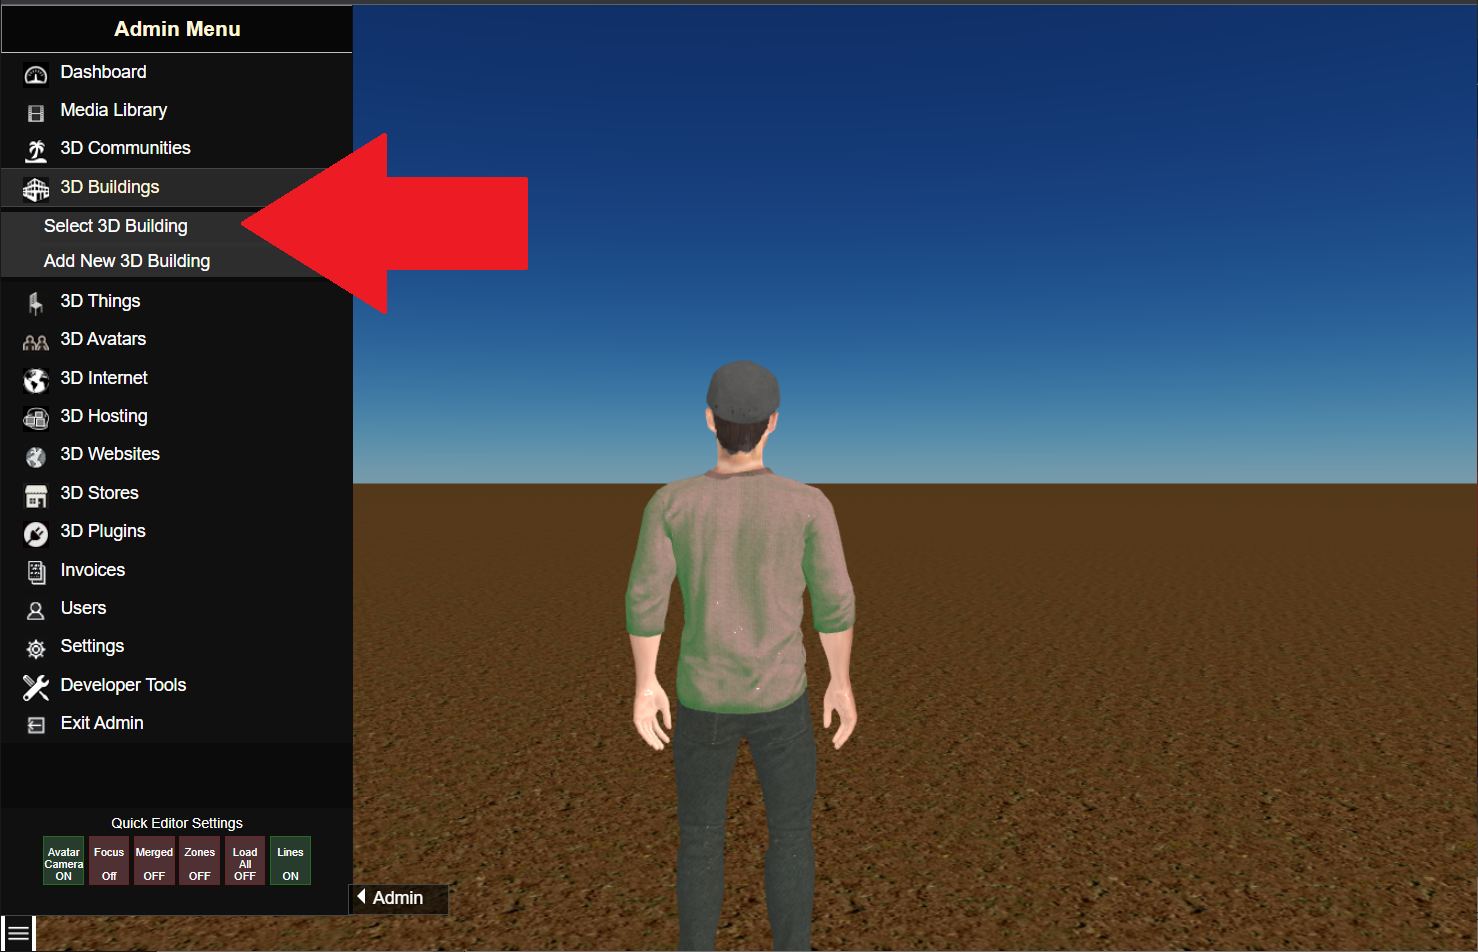
Expand the 3D Buildings Menu Option and click Select 3D Building.
Select your 3D Store Building to open it in the Admin Mode Editor.
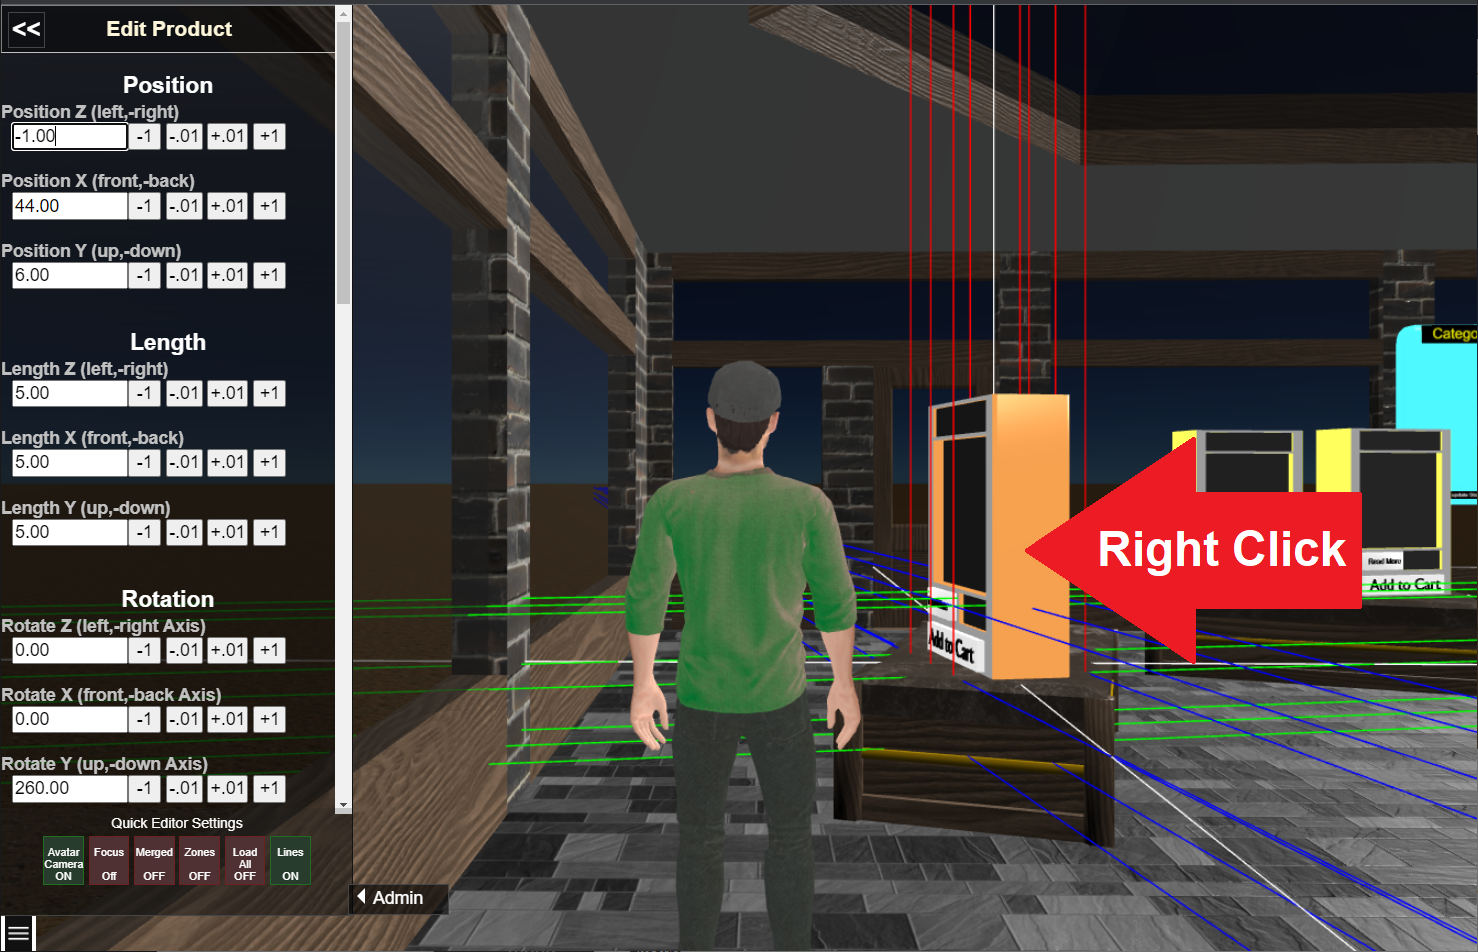
Walk into your 3D Store and position your screen where you can see the product display you would like to edit.
Using your mouse, Right-Click the product display to open the Edit Product form on the left.
Position, Scaling, and Rotation can be set by typing a new number (will set in the screen when you move to the next form field) or you can click the + or – buttons to change the values (click and hold to repeat).
 Scroll the form down to see the next selections.
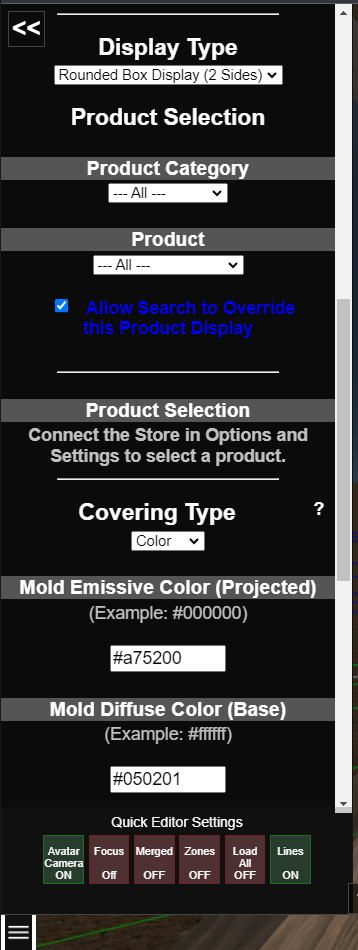
Display Type – There are 2 sided displays, 1 sided displays, and display of information with buttons, but without the image (Handy if you are using a 3D Model as your product display).
Product Selection – Optional setting to limit a category or product on this display. It helps when you want to set a section of your 3D Store as a category or highlight a particular item on sale.
Allow Search to Override – Each product display can be designated to either assist in search results or stay on a particular category or item. This is only in use when you have added a Search 3D Web Object to your 3D Building.
Covering Type – The covering can be a color, texture, or any of the values available. This only effects the outer casing of the product display and not the picture or buttons.
Based on your Covering selection, you may see color selections or options to select and/or upload a texture.
 Scroll the form down to see and expand the Advanced Options selection.
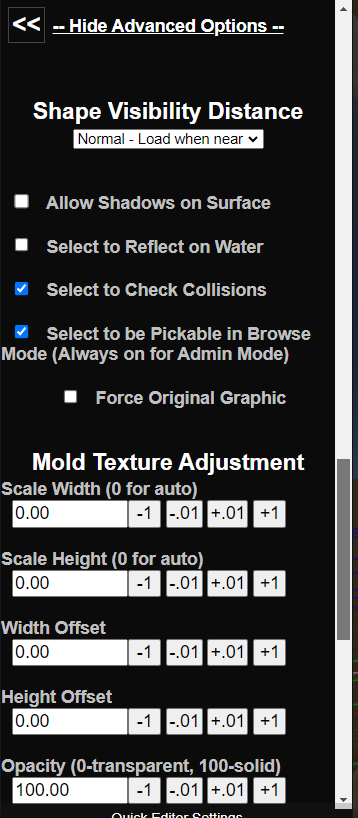
Shape Visibility Distance – is used to determine when the Product Display is rendered into the 3D Scene. These selections are Action Zones (Invisible cube Load Zones that renders select 3D Objects into the 3D Scene when your avatar enters the zone) and can be added or edited separately.
Allow Shadows on Surface – This may lessen the brightness of your displays when shadows of the roof or avatars passing reach your Product Display.
Select to Reflect on Water – When your 3D Building is near water, if this is selected, it will render a reflection in the water. There is no need to add things when it is not near water, it would only slow down the render.
Select to Check Collisions – When checked, avatars will not be able to walk through your Product Display. You can save render time by unchecking this when the avatar cannot get to your Product Display because of other objects blocking their path.
Force Original Graphic – Used with textures. By default, textures are properly resized based on your computer graphics ability. When this is checked, it will ignore the graphics ability and use the original graphic.
Mold Texture Adjustments – allow you to scale and align textures. For example, when the texture has brickwork and spans multiple objects, each object texture can be sized and aligned.
Opacity – This is the transparency setting for the Product Display. It can make it look like glass with reflections.
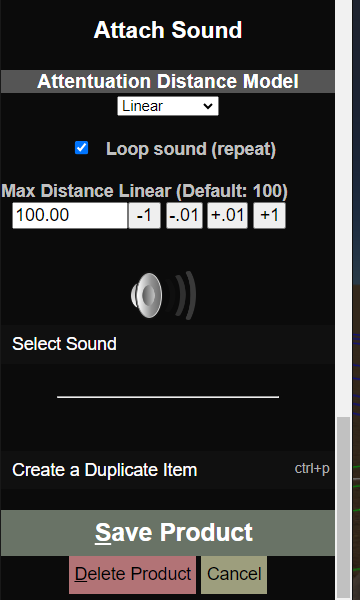
Attach Sound – you are able to attach a sound that works in 3D! Add a sound and the relative distance that the sound will travel. As the avatar approaches or retreats, the sound gets louder or quieter respectively.
Create a Duplicate – After you save your Product Display, edit it and select this option to create a duplicate Product Display (matches all settings except position). Then it opens the new Product Display in Edit Mode.
Save, Delete, and Cancel – Works as expected. Cancel will revert all of your changes since it was last saved.
Related topics: Add Product Displays, Connecting 3D Stores to WordPress WooCommerce and Connecting 3D Store Buildings to Product Displays.