This article takes you through the WalkTheWeb® plugin for WordPress with the WooCommerce Shopping Cart.
To start, in your WordPress, search, install, and activate the WalkTheWeb WordPress plugin.
Step 1 Step 2 Step 3 Step 4 Step 5
Getting Started
Navigate to WalkTheWeb on your WordPress Admin Menu.
Click Create a 3D Shopping Website to begin.

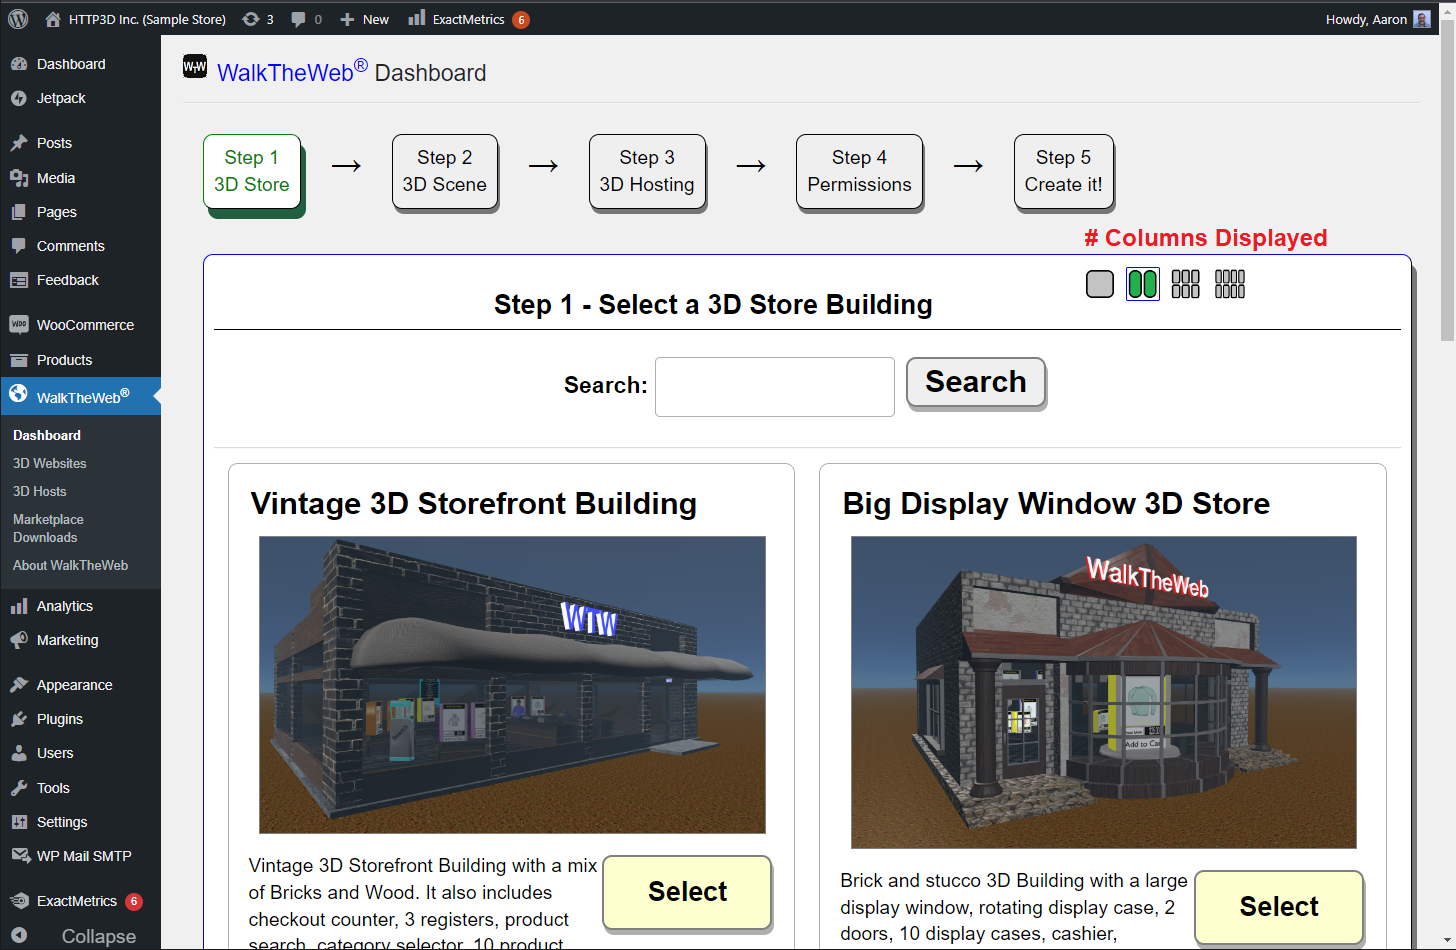
Step 1 – Select a 3D Store Building
Feel free to use the keyword search to look beyond our preset 3D Stores.
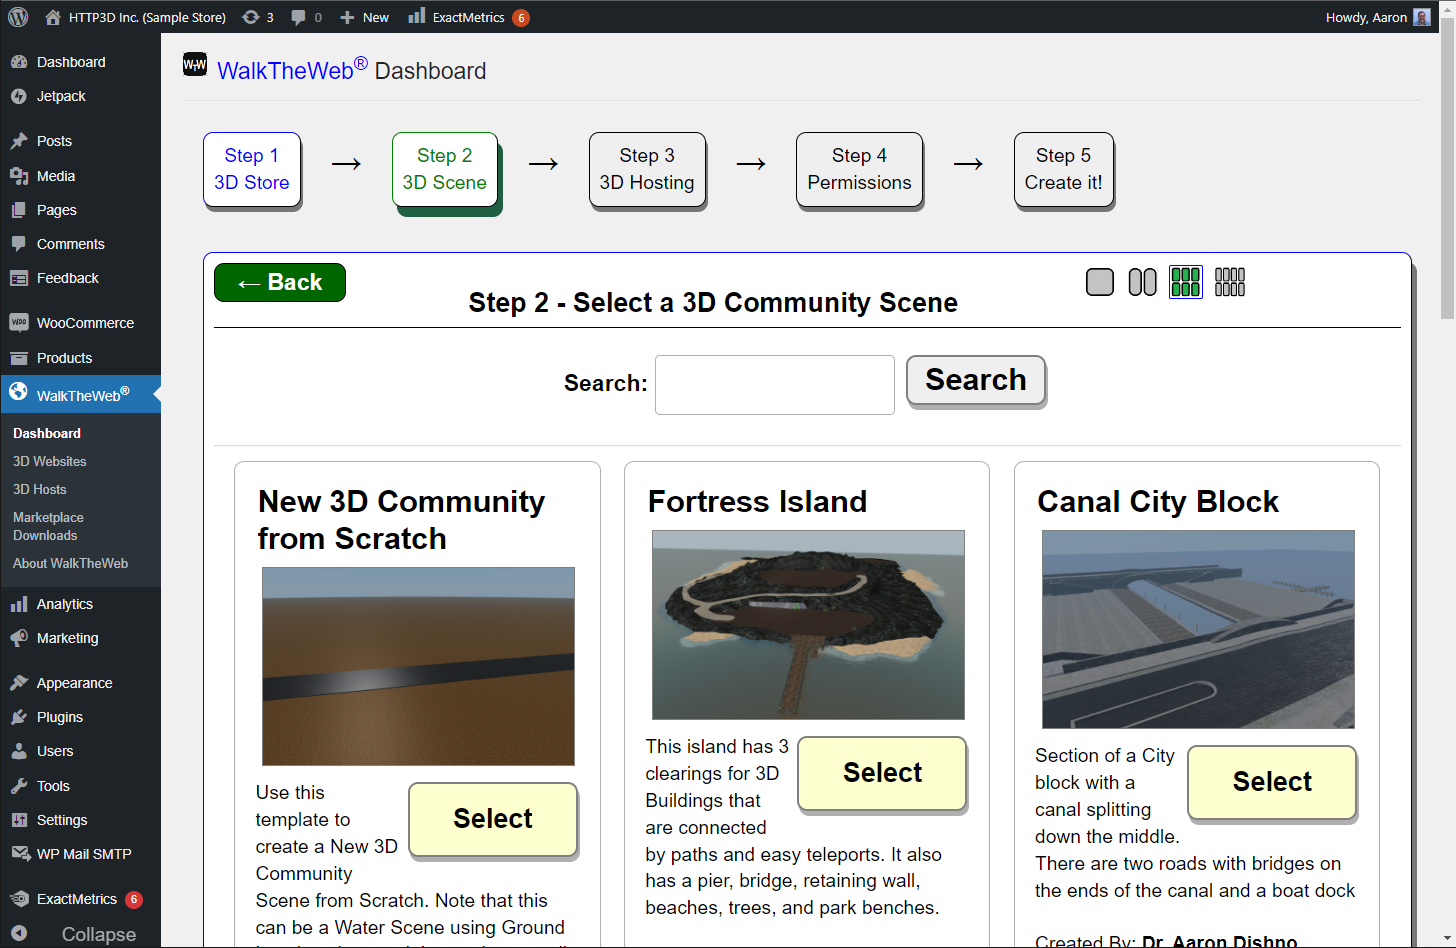
Step 2 – Select a 3D Scene
Feel free to use the keyword search to look beyond our preset 3D Community Scenes.
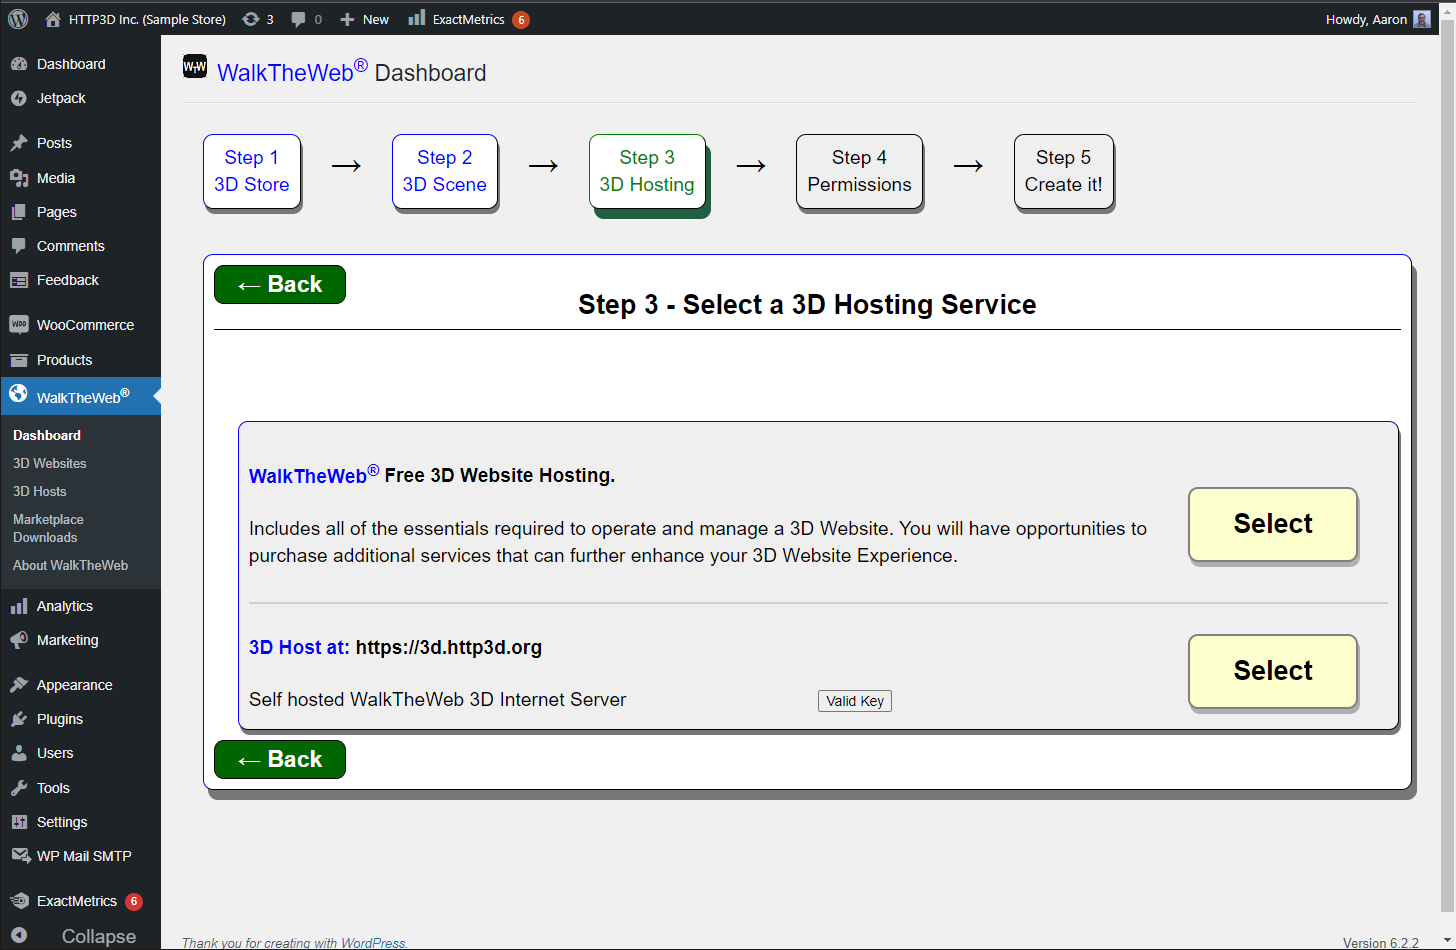
Step 3 – Part A – Select a 3D Hosting Service
You can add another WalkTheWeb Open-Source hosting server under the menu for 3D Hosts.
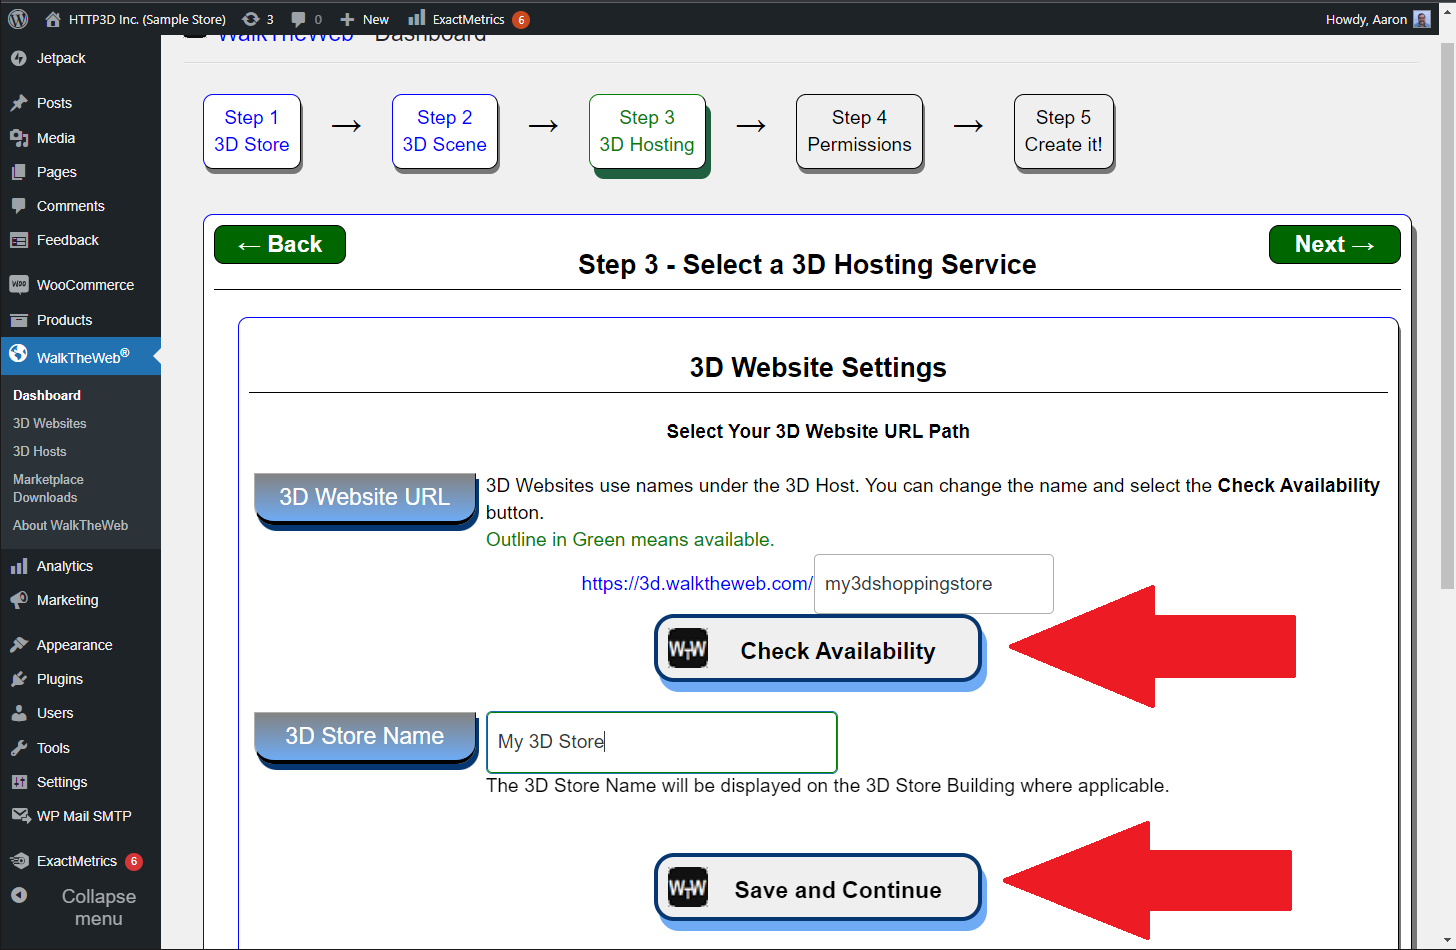
Step 3 – Part B – Select a 3D Hosting Service
Select the name for your URL and click the Check Availability button to confirm it is not in use.
When availability is confirmed, the Save and Continue button will be shown.
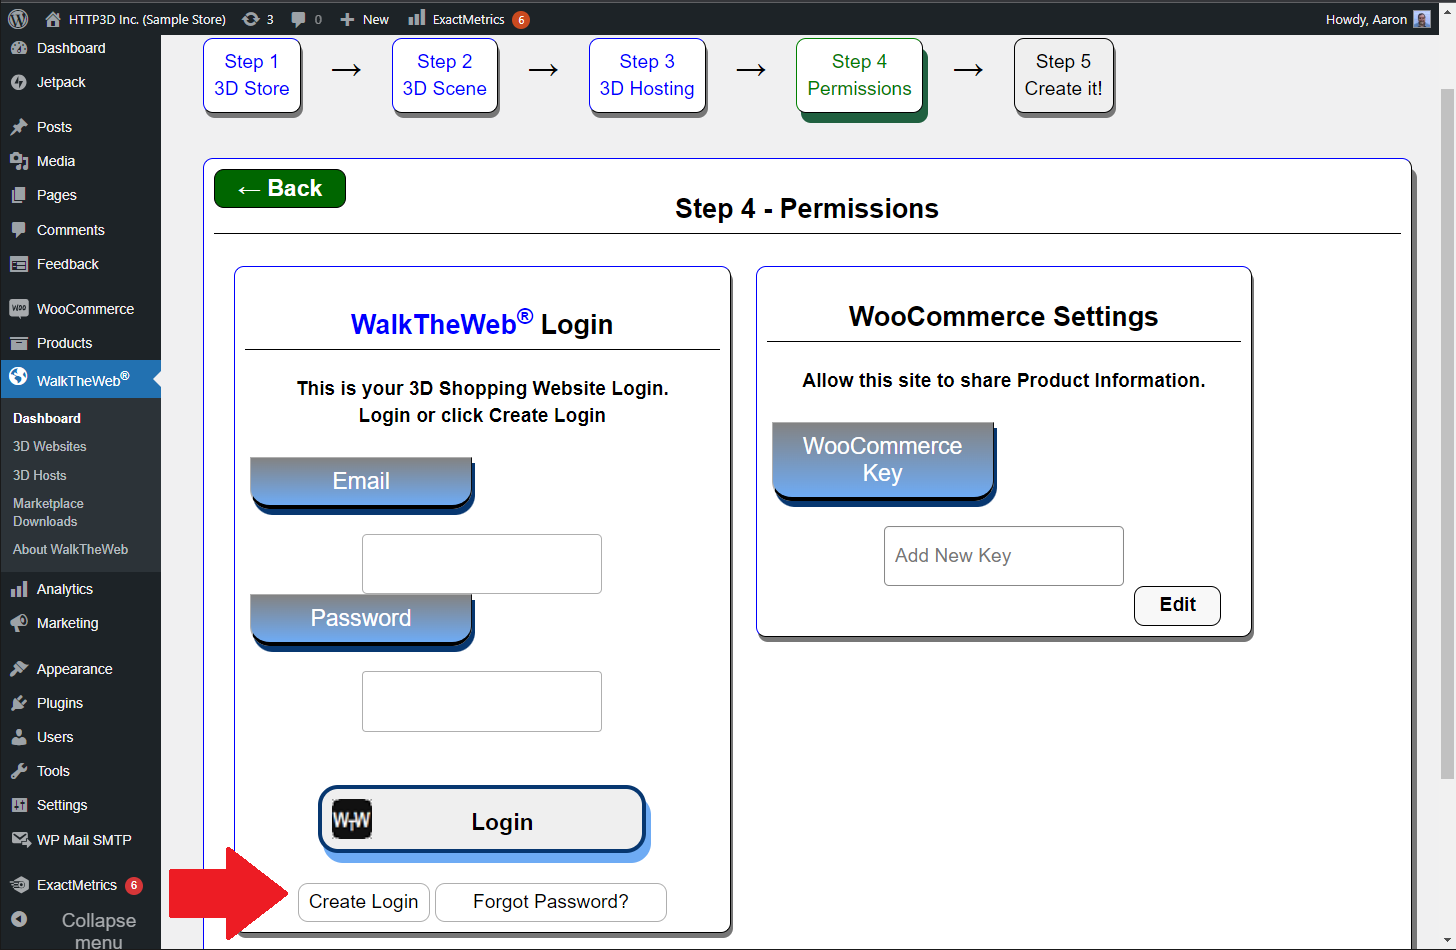
Step 4 – Part A – Permissions
WalkTheWeb Login – You will need a Global WalkTheWeb account to use this service. Login or click the button to Create Login.
WooCommerce Settings – WooCommerce uses an API Security Key to allow access to the eCommerce Online Store Data. If you do nothing, we will automatically create one. If you wish to add one manually, you can select the Edit button.
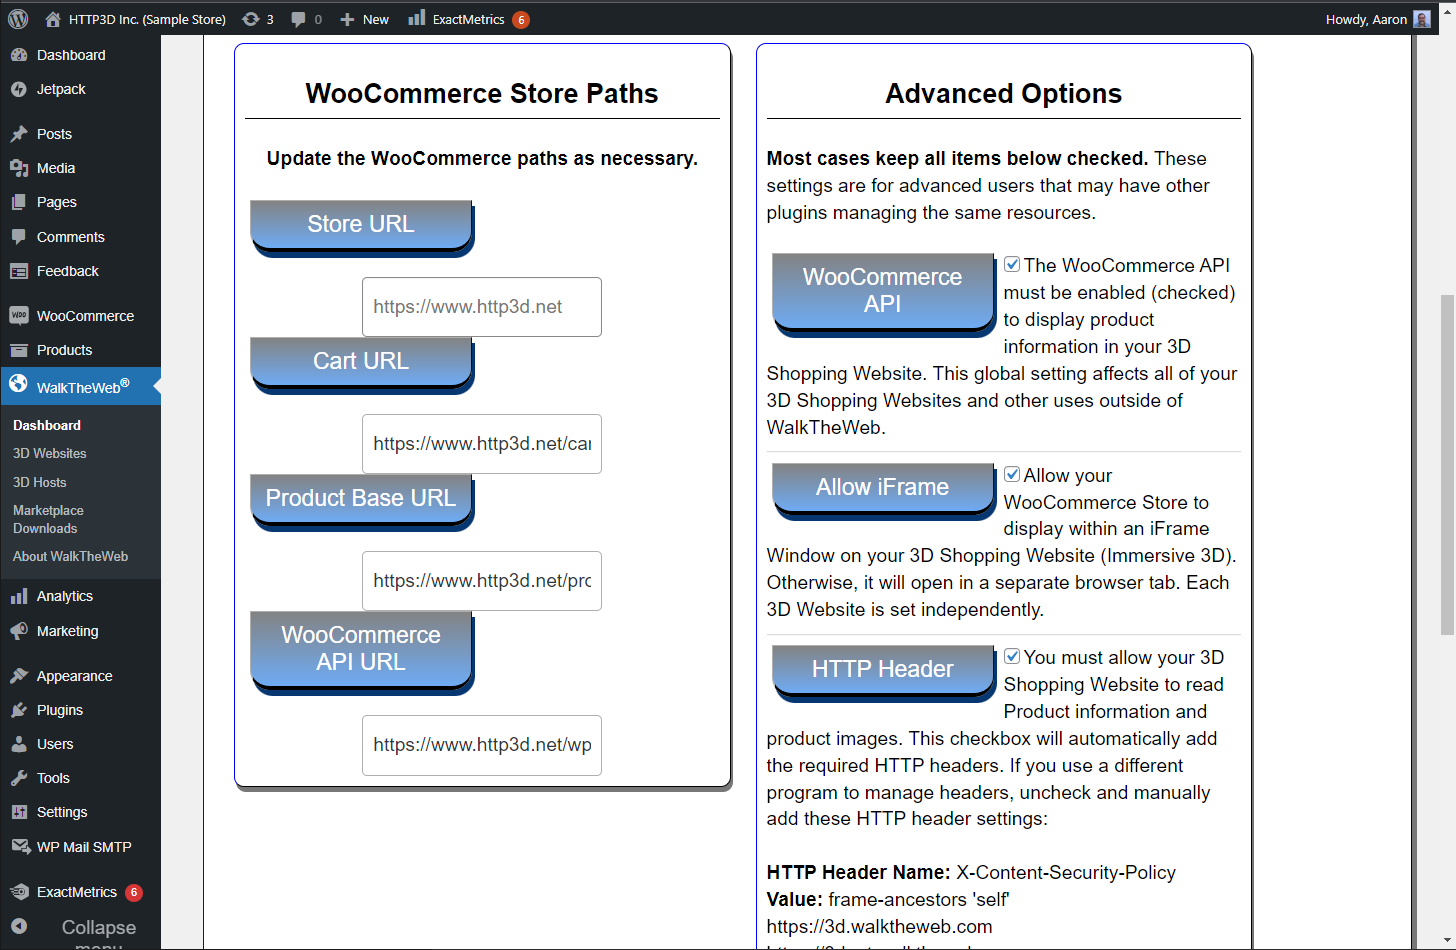
Step 4 – Part B – Permissions
WooCommerce Store Paths – If you modified the default paths in WooCommerce, you can set the same paths here.
Advanced Options –
WooCommerce API checkbox will enable or disable the connection to and from your products. WalkTheWeb uses a Read Only connection.
Allow iFrame – when browsing your 3D Website, if you click on a product to Read More or Add to Cart, it opens your original Online Store webpage. You can have it as an overlay iFrame on the 3D Website or open in a new Browser Tab based on this checkbox.
HTTP Header – The iFrame above only works if you allow the 3D Website to put your online store website in an iFrame using these settings. This will not allow any other websites (outside this list), to put your online store website into an iFrame. The text will give you the exact settings in case you need to manually add it to work with any other plugin (rare).
Click Next on the top or bottom of the page (not shown in image).
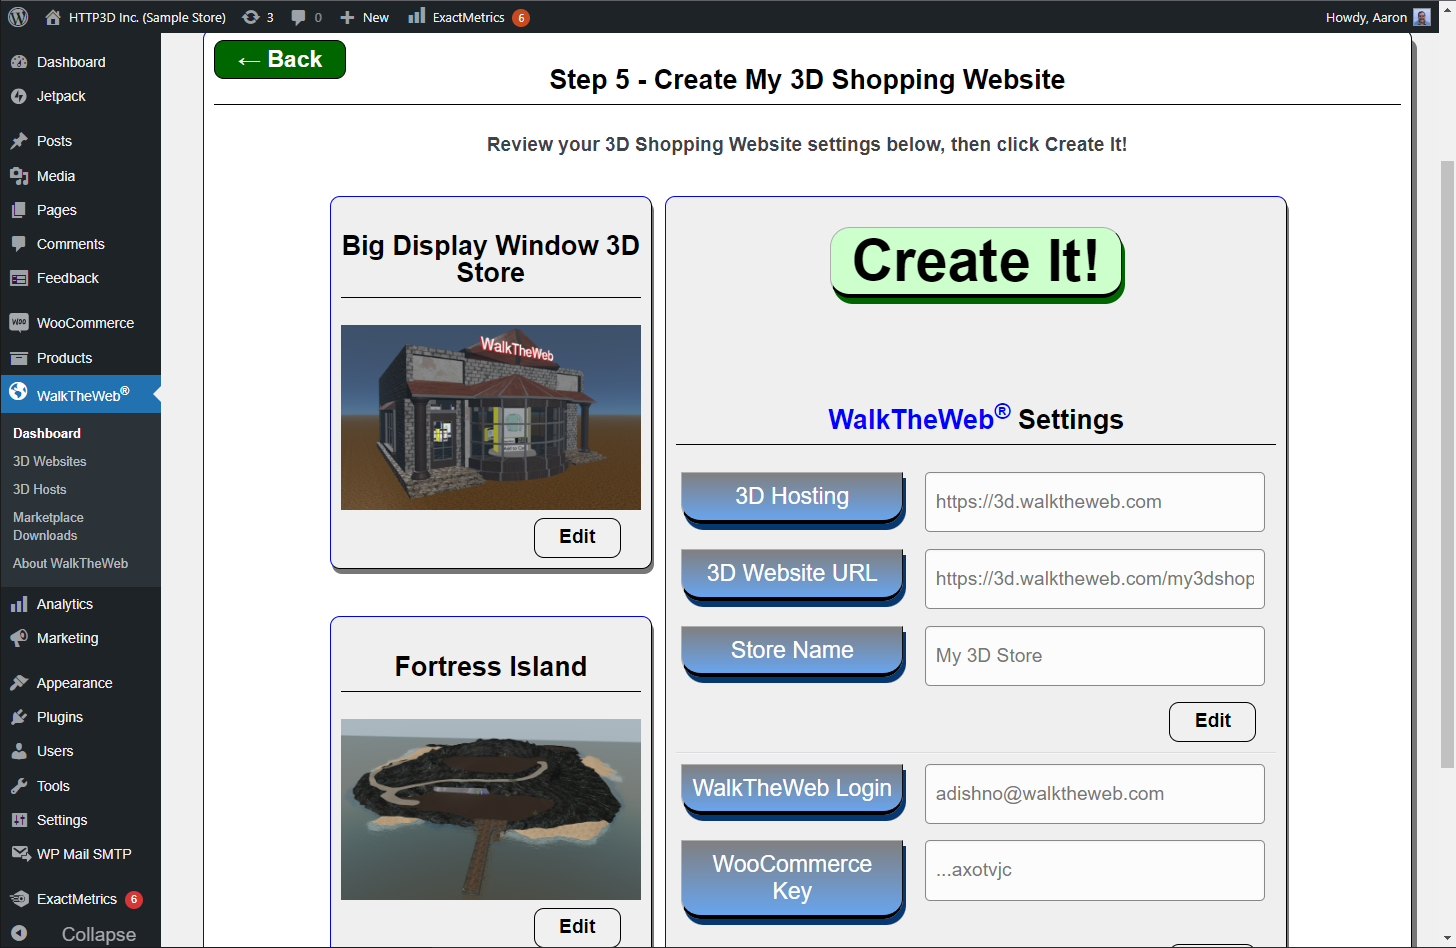
Step 5 – Create It!
You can use any of the Edit buttons to go back and change your selections. When ready, select Create It!
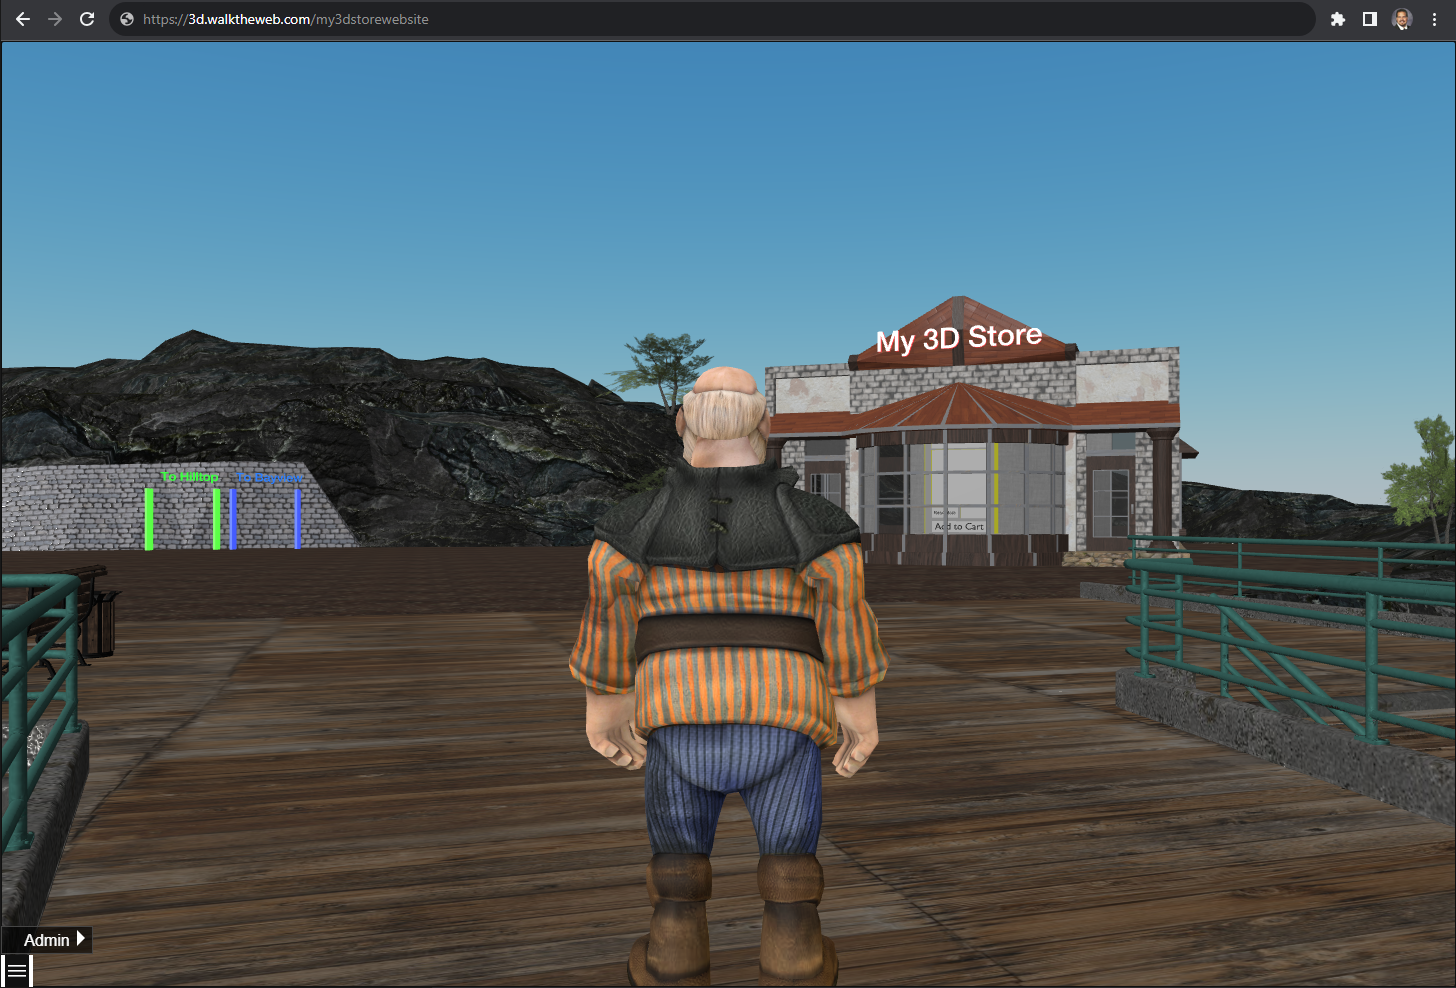
Click Visit your New 3D Shopping Website
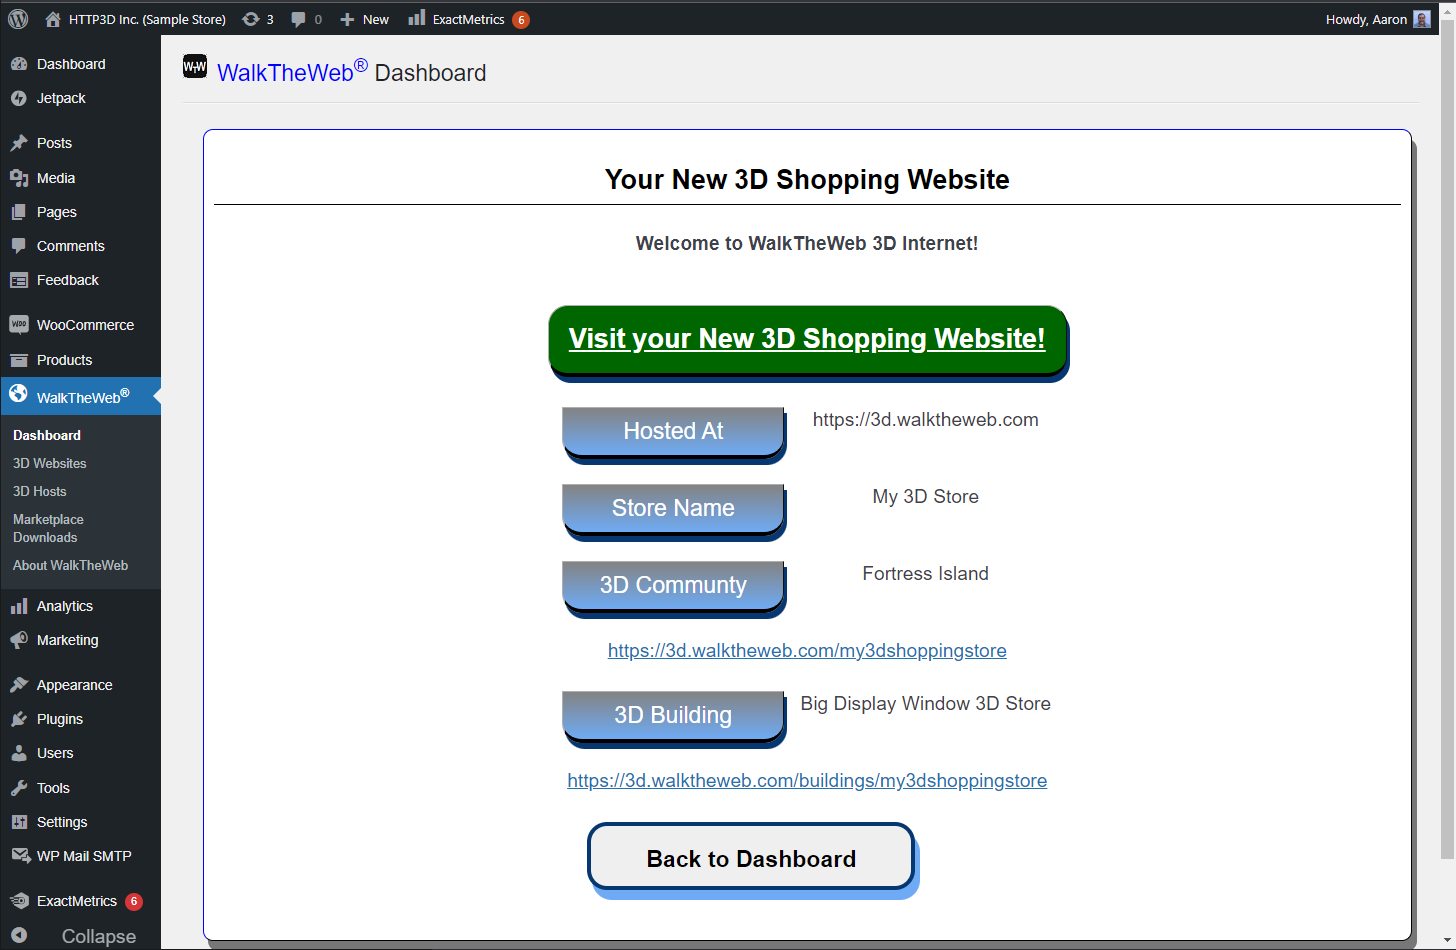
3D Website – you will be prompted to Enter or Login.
Enter will randomly select an Avatar and enter as a guest.
Login gives you the option to select your Avatar.
You can use Keyboard (arrows or ADWS RF Keys), Mouse (wheel to move forward, click and hold to rotate view), or Swipe for Touch. You can also click (or tap) a location on the ground to move to that location.