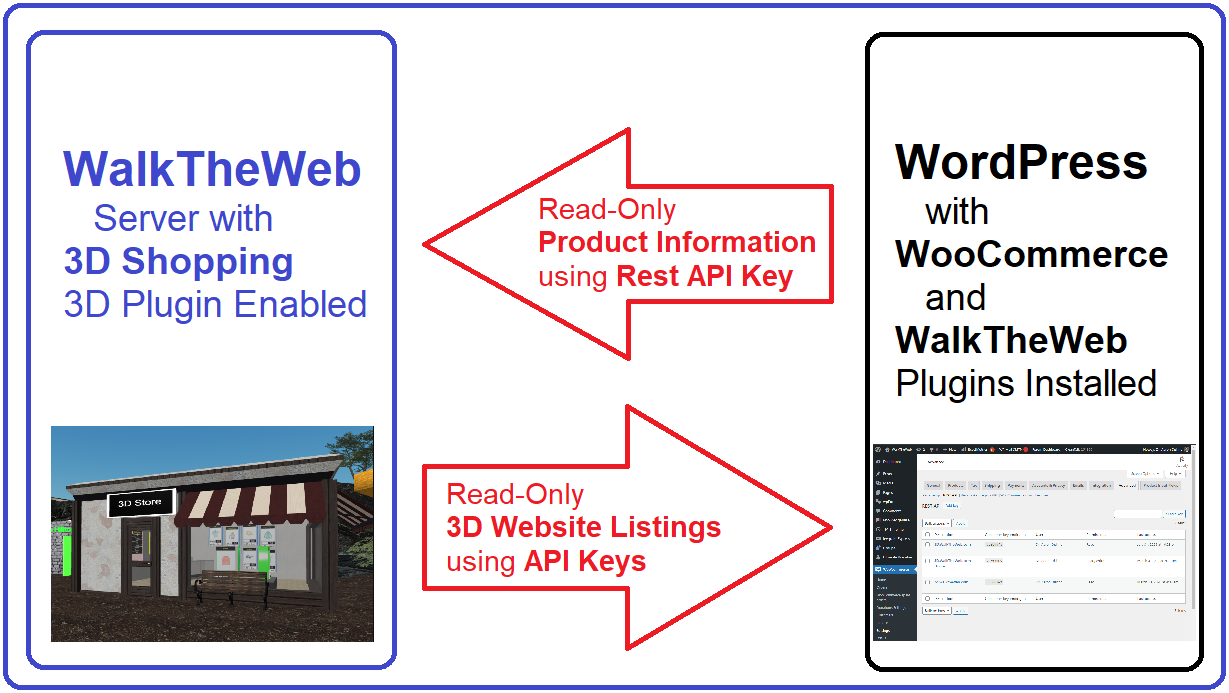
There are 2 systems involved with connecting your 3D Store to your Online Store, WalkTheWeb 3D Internet Server and WordPress.
WalkTheWeb 3D Internet – Requires the 3D Shopping 3D Plugin to be enabled (it is distributed with WalkTheWeb).
WordPress – Requires the WooCommerce Plugin and the WalkTheWeb WordPress plugin to be installed and active.
Here is the general idea for the connection… Both sides require an API Key and use Read-Only permissions.
When you use the Create a 3D Shopping Website button in WordPress WalkTheWeb plugin, it will automatically create all of the needed API connections. It does require Admin or Host Access to the WalkTheWeb 3D Internet Server.
Otherwise, you can create these API Keys separately and install them manually.
Start with your WordPress Server.
- Admin (Dashboard), Select WooCommerce from the menu.
- Select Settings under WooCommerce.
- Select Advanced Tab.
- Select Rest API under the Tabs.
- Select Add Key button.
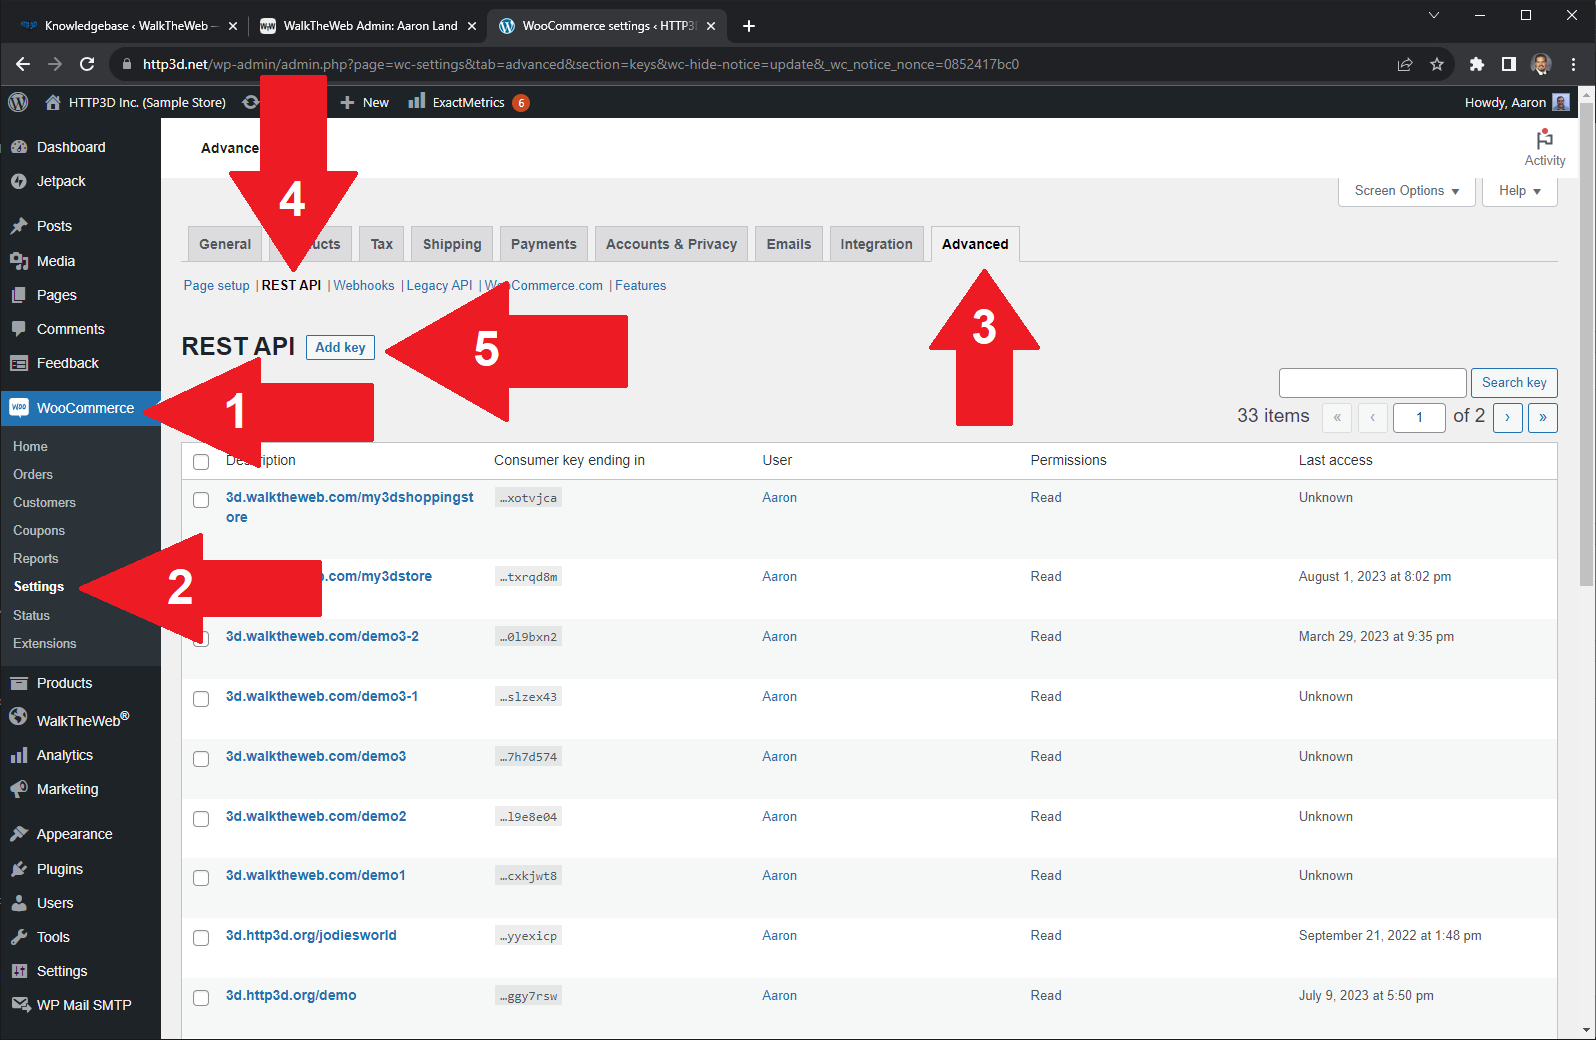
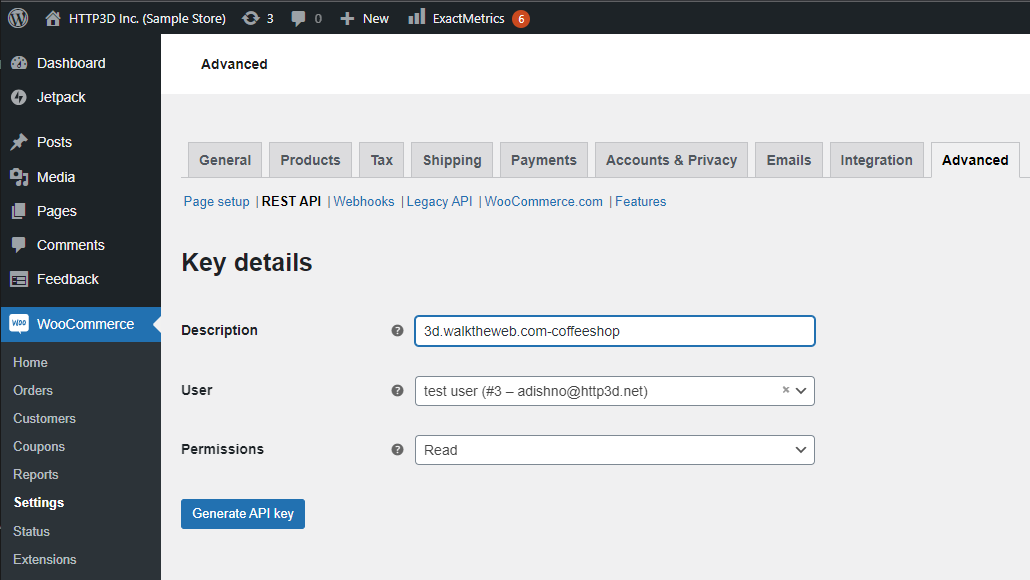
Description can be anything you like, I tend to use the path to the 3D Website with hyphens instead of back slashes. This makes it easy to see which KEY is going to which website, making it easy to disable one if needed.
User – must have access to the WooCommerce Plugin.
Permissions – Read is all that is needed. WalkTheWeb does not update the WooCommerce Online Store, it only opens the Online Store in a browser window, keeping all of your orders taken and coming from the same place.
Click Generate API Key.
Copy both the Consumer Key and the Consumer Secret into a safe temporary place. Note that when you leave this screen, you will not see these complete values again. If you do not copy them, you will have to create a new key.

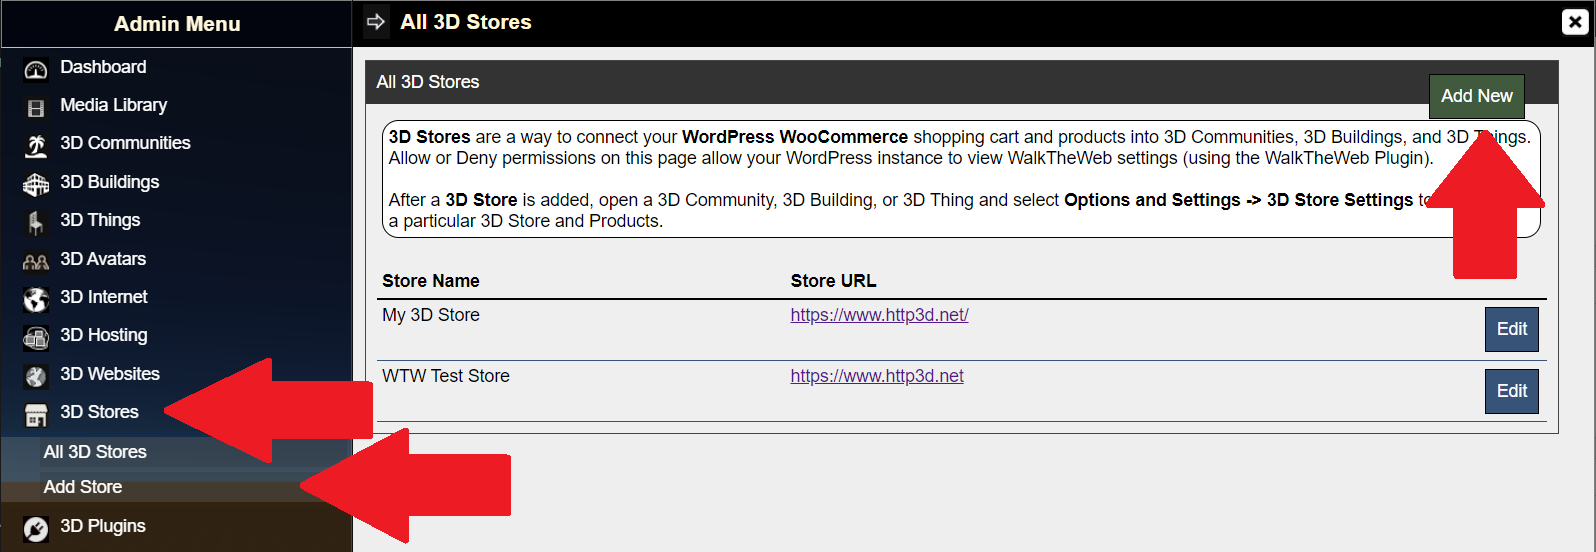
Now we go to the WalkTheWeb 3D Internet Server.
Login to your 3D Website and open the Admin Mode (Browse Menu on the bottom, Admin Home icon).
- Select 3D Stores.
- Select Add Store (or the Add New button)
Store Name – is anything you like to call Your Store.
Allow iFrames – will set your Shopping Cart and Read More product information into an iFrame. If you uncheck this, the information will appear in a separate browser tab instead.
Store URL – Your WooCommerce Online Store main website home page. When you enter this value, the Cart, Product, and WooCommerce API URL will automatically populate. Feel free to update them if needed. The default works for most default installs of WooCommerce.
Store Cart URL – the path to your Shopping Cart Page.
Store Product URL – the path to your Shopping Cart Product root.
WooCommerce API URL – this is the path to the API for WooCommerce. Different versions of the API may use a different path. This defaults to the latest.
WooCommerce Key – Copy the value saved from the WordPress above steps.
WooCommerce Secret – Copy the value saved from the WordPress above steps.
Click Add Store.

It is all set.
You can now assign 3D Communities, 3D Building, and 3D Things to use this 3D Store products.
Click here for more information about Connecting a 3D Building to your Products.
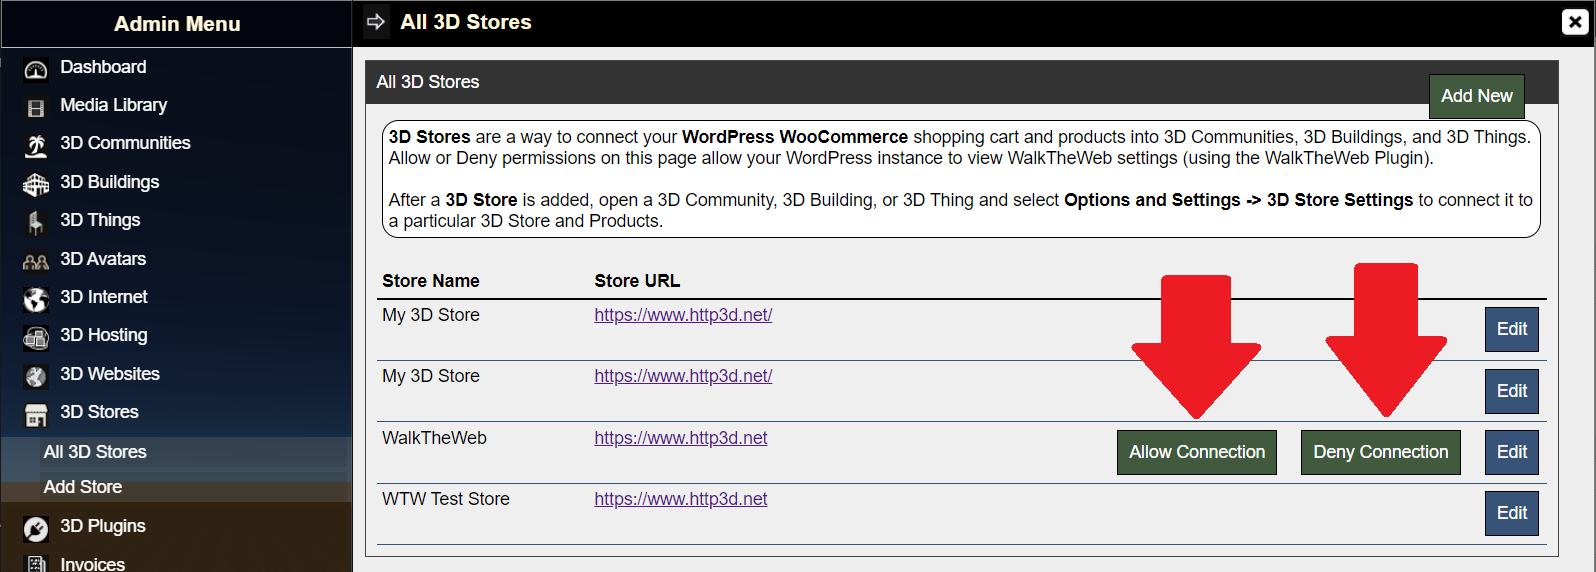
If you see any buttons to Allow Connection or Deny Connection on your list of 3D Stores, these were created from WordPress WalkTheWeb plugin and the user may not have had enough permissions to complete the connection. Remember that these connections are Read-Only. You can allow or deny these connections as you see fit.
To Revoke access to your WalkTheWeb 3D Websites list, Click the Edit button next to the 3D Store, then click Delete to remove the 3D Store access.
Related topics: Add Product Displays, Edit Product Displays, and Connecting 3D Store Buildings to Product Displays.